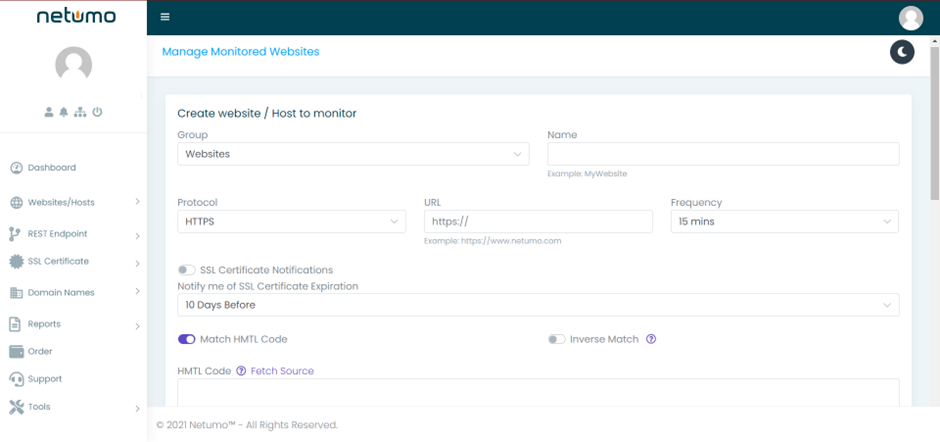
To have full customization of the features of Netumo you should create monitors using the advanced monitor as shown below.
To add an advanced monitor:
1. Choose the group of monitors you want the monitor to be in and enter a suitable name for your new monitor.
You can create groups and add monitors to different groups for easier management. You can manage these groups by clicking on ‘Websites/Hosts’ and then choosing ‘Manage Groups’. A default group called ‘Websites’ is created when the first monitor is created.
2. Then, choose the protocol for your URL, enter the URL and specify the frequency of checks that will be done on your monitor. These checks can vary from 1 minute to 60 minutes.
3. Next, choose when to be notified about any expiring SSL Certificates (same option present in adding a basic monitor).
4. The next step would be the Match HTML Code function. What this function does is that it checks the HTML code entered (not more than 255 characters) in the HTML Code field, and it checks that the returned content is the same as what was expected according to the HTML code entered. This function checks that your website does not contain any errors. To view the HTML of your website, all you have to do is right-click anywhere on the website and choose ‘View Source’. If the expected return does not match what was returned from the website, Netumo will notify you about the irregularity with a NoMatch alert.
We suggest that you include the HTML of a key feature of the website such as the website menu, navigation bars or any other important functions.
5. If you are subscribed to one of our paid plans, you will have an extra option called ‘Inverse Match’ which is not available to free plan users. This option notifies you when the returned output matches the expected return of the website instead of when there is an irregularity.
6. Next is the HTTP Headers section.
This section lets you change some settings from the HTTP header.
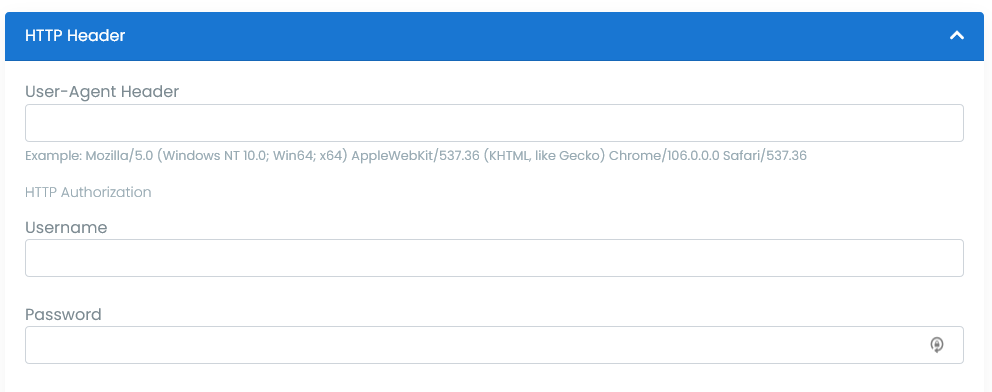
You can specify a different User-Agent header than the default that Netumo uses. Enter something like the below to impersonate Google Chrome.
Mozilla/5.0 (Windows NT 10.0; Win64; x64) AppleWebKit/537.36 (KHTML, like Gecko) Chrome/107.0.0.0 Safari/537.36
More User Agent samples on https://useragentstring.com/
If the website is protected via HTTP username and password authentication (Authorization header), you can enter them directly
Please do not confuse HTTP credentials with other website customer authentication methods via a username and password field.
7. You can also choose where to get notified and when to get notified, whether it is immediately or up to 5 minutes later. You can also switch on the option of receiving notifications only when there is something wrong instead of receiving notifications when everything is fine.
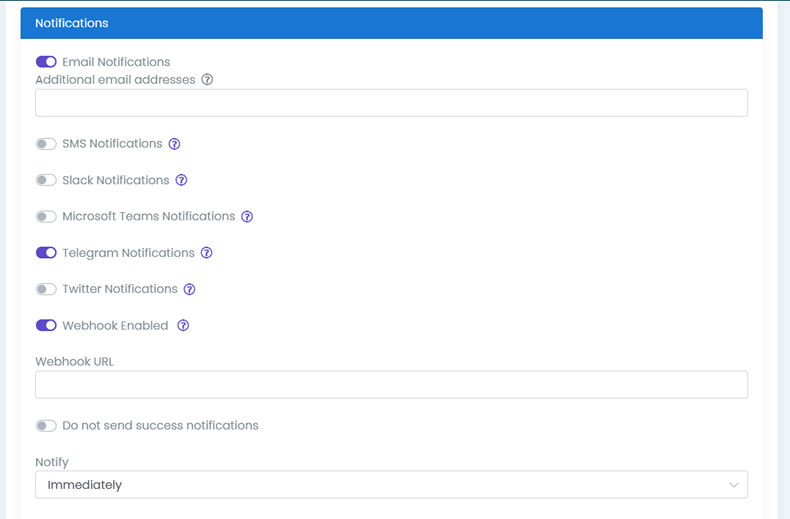
Notify on Status Change Only will only trigger alerts when there is a change in state (Down to Up) and not repeat the down notification every 2 hours. This is typically useful if email notifications are sent to a ticketing system as each alert will open a new ticket.
8. Click on the ‘Create Monitor’ button when the steps above are completed. You can also test that all data entered is correct by clicking on the ‘Test’ button.
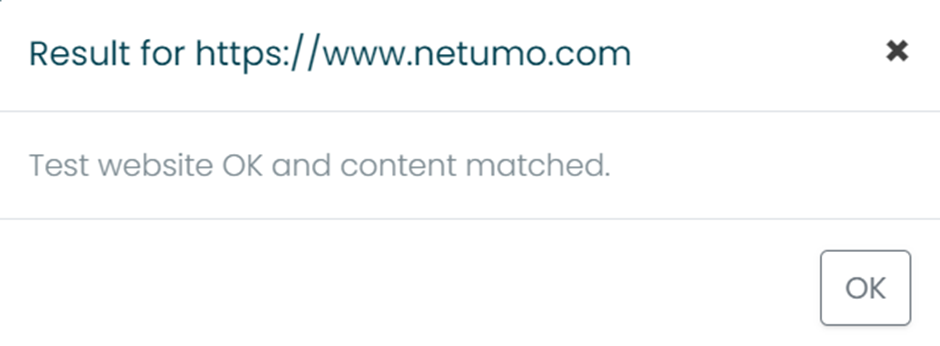
If all the data entered is correct, the above message dialog will be output on your screen.